Understanding Shell Care and Cleaning Fundamentals
Before embarking on any shell care and cleaning project, proper species identification serves as the foundation for preservation success. Different mollusk families possess varying structural compositions and surface characteristics that dictate appropriate handling procedures. For instance, the delicate paper nautilus (Argonauta species) requires markedly different treatment than the robust Florida fighting conch, as their wall thicknesses and chemical compositions vary significantly. Consulting field guides or online databases such as the World Register of Marine Species ensures you understand whether you are handling a calcium carbonate-based specimen or one with specialized structural adaptations.
Recognizing the fundamental difference between calcium carbonate shells and chitinous specimens prevents irreversible damage during the cleaning process. Most marine shells consist primarily of calcium carbonate in the form of aragonite or calcite, making them susceptible to acid erosion and mechanical abrasion. Conversely, chitinous specimens such as the internal shells of cuttlefish or the egg cases of certain gastropods require gentler, pH-neutral cleaning approaches that avoid water saturation. Understanding these material distinctions helps collectors select appropriate solvents and physical cleaning methods that preserve structural integrity rather than compromise it.
Safety protocols represent a critical yet often overlooked aspect of shell care and cleaning, particularly regarding potential marine pathogens. Shells collected from intertidal zones may harbor Vibrio bacteria or other microorganisms capable of causing infections if introduced through cuts or abrasions. Always wear nitrile gloves when handling freshly collected specimens, and work in well-ventilated areas to avoid inhaling dust from dried organic matter or chemical fumes from cleaning agents. Additionally, shells containing decomposing tissue should be processed outdoors or in isolated areas to prevent the spread of odor-causing bacteria into living spaces.
Essential Tools and Supplies for Shell Maintenance
Building a comprehensive toolkit for shell maintenance requires selecting instruments that balance effectiveness with preservation sensitivity. Soft-bristled artist brushes, particularly those with natural sable or high-quality synthetic fibers ranging from size 000 to size 6, allow for precise cleaning of intricate spiral structures without scratching delicate surfaces. Dental picks and probes with carbide or stainless steel tips prove invaluable for removing calcified barnacles and coral attachments, though collectors should maintain a light touch to avoid gouging the underlying shell material. Many experienced conchologists also utilize wooden orange sticks or bamboo skewers as gentler alternatives for initial debris loosening on particularly fragile specimens.
The chemical components of your cleaning arsenal significantly impact long-term preservation outcomes, making distilled water and mild phosphate-free detergents essential staples. Tap water contains minerals and chlorine that can leave deposits on shell surfaces or react with organic compounds, whereas distilled water ensures a pure cleaning medium that evaporates without residue. When selecting detergents, choose products specifically labeled as phosphate-free and biodegradable, as harsh surfactants can strip the protective periostracum layer that gives many shells their natural coloration. Products such as Orvus Paste or simple unscented castile soap diluted to 1% solutions provide adequate cleaning power without chemical aggression.
Personal protective equipment forms the final component of proper shell cleaning supplies, safeguarding both the collector and the collection. Nitrile gloves prevent skin oils from transferring to porous shell surfaces while protecting against bacterial exposure and chemical irritants. Dust masks rated N95 or higher become essential when brushing dried shells or sanding repairs, as inhalation of calcium carbonate dust can irritate respiratory passages. Additionally, magnifying visors or desk lamps with daylight-balanced LED bulbs (5000-6500K) enable detailed inspection of cleaning progress without the heat damage associated with incandescent bulbs.
Initial Cleaning: Removing Surface Debris and Organisms
The initial shell cleaning process begins with controlled freshwater soaking protocols designed to loosen embedded sand, algae, and soft organic matter without mechanical intervention. Submerge specimens completely in room-temperature distilled water for 24 to 48 hours, changing the water every 12 hours to prevent bacterial proliferation and odor development. For shells with heavy marine growth, adding a tablespoon of baking soda per gallon of water creates a mildly alkaline environment that accelerates the loosening of algae and protozoan attachments. During this soaking period, avoid using hot water, as thermal shock can cause micro-fractures in the shell structure, particularly in specimens collected from temperate or polar waters.
Gentle mechanical removal of persistent attachments requires patience and the proper selection of tools based on the encrustation type. Barnacles and tube worms often respond to careful application with dental picks, working from the outer edges inward to avoid levering against the shell surface. For coraline algae or calcified sponges, soaking the affected area with white vinegar applied by cotton swab for 30 seconds can dissolve the calcium carbonate bond holding the organism to the shell—though this technique requires immediate neutralization with distilled water to prevent acid damage to the specimen itself. Always support the shell against a padded surface while working, as the pressure applied during cleaning can crack thin-walled specimens such as olive shells or Marginellas.
Proper rinsing techniques following mechanical cleaning prevent the buildup of mineral deposits that can mar shell luster over time. After removing visible debris, rinse specimens under a gentle stream of lukewarm distilled water, rotating the shell to ensure all cavities and siphonal canals flush completely. For gastropods with intricate sculpture or deep umbilici, use a rubber bulb syringe to force water into tight spaces where debris accumulates. Final rinses should utilize deionized water if available, followed by air-drying on absorbent microfiber cloths away from direct sunlight or heat sources. Never use paper towels for drying, as wood fibers can scratch polished shell surfaces and leave lint in surface irregularities.
Deep Cleaning Methods for Different Shell Types
Advanced seashell cleaning methods require distinct approaches for gastropods versus bivalves due to their structural differences and vulnerability points. Gastropods, with their single continuous shell and often elaborate sculpture, demand cleaning techniques that respect their spiral architecture and potential thin spots near the apex. When addressing calcified deposits on conchs or whelks, apply gentle pressure with soft brass brushes in the direction of the shell growth lines rather than against them, reducing the risk of lifting layers of nacre or breaking delicate varices. For bivalves, special attention must focus on the hinge area where the two valves connect, as aggressive cleaning here can damage the ligament or delicate hinge teeth that provide taxonomic identification characteristics.
Preserving the periostracum layer—the organic outer coating that gives many shells their rich colors and velvety texture—requires particular caution during deep cleaning. This protein-based layer dissolves readily in alkaline or acidic solutions and abrades easily under mechanical cleaning. When removing calcified deposits from shells such as cowries or murexes, first attempt chemical softening using prolonged soaking in distilled water rather than immediate scraping. For specimens where the periostracum has already degraded, revealing the calcareous layer beneath, avoid further chemical intervention and limit cleaning to gentle dusting and surface wiping to prevent exposing the underlying prismatic or nacreous layers.
Ultrasonic cleaning offers an advanced option for experienced collectors dealing with intricate specimens free of loose fragments or repairs. Units operating at frequencies between 35 and 45 kHz effectively dislodge microscopic debris from suture lines and surface sculpture without manual abrasion. When employing this technique, suspend shells in distilled water using plastic mesh or dental floss to prevent contact with the tank bottom, and limit cleaning cycles to three minutes followed by visual inspection. Never ultrasonically clean shells with existing cracks, repairs, or those composed of chalky calcium carbonate, as cavitation can propagate fractures and cause catastrophic breakage in fragile specimens such as paper fig shells or certain Spondylus species.
Whitening and Color Restoration Techniques
Restoring shell color often involves whitening treatments to remove staining while enhancing the natural luster that time and exposure have diminished. Hydrogen peroxide serves as the preferred bleaching agent among serious collectors, offering controlled oxidation without the structural degradation associated with chlorine bleach. For maintenance whitening of lightly yellowed specimens, a 3% solution (standard pharmacy strength) applied for 15-30 minutes suffices, while heavily stained shells may require stronger 10% solutions available from beauty supply stores, though never exceeding soaking periods of two hours. Always stabilize shells in plastic mesh containers within the solution to ensure even exposure and prevent floating, and rinse thoroughly with distilled water immediately after treatment to halt the oxidation process.
Controlled sun bleaching provides a gentle alternative for shell whitening techniques, though it requires careful monitoring to prevent brittleness and fading of natural pigments. Place damp shells on white cotton cloths in indirect sunlight for three to four hours, rotating every 30 minutes to ensure uniform exposure. This method proves particularly effective for large conch shells and helmets where chemical soaking would prove impractical due to size constraints. However, prolonged UV exposure can degrade the organic matrices binding calcium carbonate crystals, potentially leading to surface crazing or structural weakness, so never exceed single-day exposure periods and allow shells to rest in dark storage for 48 hours between bleaching sessions.
Enhancing natural luster following cleaning requires the application of conservation-grade oils or waxes that protect without creating artificial gloss. Mineral oil applied sparingly with cotton swabs restores moisture to dried, chalky shells and deepens color saturation, though it requires reapplication every six months and attracts environmental dust. For permanent protection, museum professionals prefer microcrystalline waxes such as Renaissance Wax, applied in thin layers with soft brushes and buffed gently with lint-free cloths. This treatment provides UV protection and moisture resistance while remaining reversible with mineral spirits, adhering to conservation ethics that prioritize future removability over permanent alteration of the specimen.
Sanitization and Odor Elimination Strategies
Effective shell sanitization addresses both biological contamination and the persistent odors resulting from organic decomposition within shell cavities. Baking soda solutions offer the safest method for neutralizing acidic decomposition byproducts while absorbing malodorous compounds. Create a saturated solution using one tablespoon of baking soda per quart of warm distilled water, completely submerging the offending specimen for 24 to 48 hours in a sealed glass container. For shells with internal chambers or extensive canal systems, use a syringe to inject the solution directly into these spaces, ensuring contact with all internal surfaces where bacteria may proliferate.
Antibacterial treatments become necessary when shells retain tissue remnants or show visible signs of biological activity such as mold or fungal growth. After initial cleaning, soak specimens in a 50/50 solution of isopropyl alcohol and distilled water for 30 minutes to eliminate remaining bacterial colonies without the corrosive effects of bleach. For museum-quality sanitization, thymol crystals dissolved in ethanol create a powerful antifungal treatment, though this requires proper ventilation and gloves due to phenol toxicity. Alternatively, enzyme-based cleaners designed for taxidermy applications, such as those containing protease enzymes, digest remaining organic material at the molecular level, eliminating odor sources rather than merely masking them.
Freeze-thaw cycles provide a mechanical method for eliminating residual organic matter through cellular disruption, particularly effective for shells with microscopic tissue traces in inaccessible siphonal canals. Place the shell in a sealed polyethylene bag with a desiccant packet, then freeze at 0°F (-18°C) for 48 hours to crystallize any remaining moisture and organic material. Allow the specimen to thaw completely at room temperature for 24 hours, then repeat the cycle two additional times. This process ruptures bacterial cell walls and forces residual decomposition gases from the shell structure, often eliminating odors that chemical treatments cannot address while posing zero risk of chemical damage to the calcium carbonate matrix.
Repair and Restoration of Damaged Specimens
Shell repair and restoration requires selecting adhesives that provide structural integrity while remaining reversible for future conservation efforts. Paraloid B-72, an ethyl methacrylate copolymer dissolved in acetone, represents the gold standard for archival shell repair, offering excellent bond strength without the yellowing or brittleness associated with cyanoacrylate superglues. Prepare a 20% solution by weight, applying it with fine-tipped brushes to both surfaces of a break before joining, then use acetone-soaked cotton swabs to remove excess before curing. Unlike superglue, which creates permanent bonds that fail catastrophically over time, Paraloid remains soluble in acetone, allowing future conservators to disassemble repairs without damaging the specimen.
Reconstructing broken spires and chipped edges demands patience and mechanical support systems during the curing process. For spiral breaks in conchs or turban shells, create a support structure using modeling clay or dental wax to hold fragments in position while adhesive sets. When missing sections prevent complete reconstruction, fill gaps using a mixture of calcium carbonate powder (matched to the shell type) and Paraloid B-72 to create a neutral fill that can be sanded and painted to match surrounding areas. Advanced restorers utilize pin-drilling techniques, inserting stainless steel insect pins coated with adhesive into broken spires to provide internal reinforcement before reattaching separated whorls.
Filling small holes and surface pitting while maintaining natural appearance requires artistic skill and material compatibility. For gastropods with minor bore holes from predatory snails or sponges, create fills using a mixture of shell dust collected from sacrificial specimens of the same species mixed with conservation-grade adhesive. Color matching involves layering thin applications of acrylic paints (Golden Fluid Acrylics work well) under magnification, building up translucent layers that mimic natural shell coloration rather than attempting opaque coverage. Always document repairs on archival labels stored with the specimen, noting the date, materials used, and extent of restoration to maintain scientific value and provenance.
Long-Term Storage Solutions
Optimal shell display and storage environments maintain stable relative humidity between 45% and 55% to prevent both desiccation and pyrite disease, a destructive condition affecting shells from sulfide-rich sediments. Pyrite disease, or pyrite decay, occurs when iron sulfides within the shell structure oxidize in humid conditions, producing sulfuric acid that destroys the shell from within. Monitor storage areas using digital hygrometers, and include silica gel canisters conditioned to maintain target humidity levels in sealed storage containers. For valuable collections, consider investing in humidity-controlled cabinets or creating microclimates within standard cabinets using Artsorb or Prosorb cassettes that buffer humidity fluctuations.
Physical support systems utilizing acid-free materials prevent chemical degradation and mechanical stress during long-term storage. Line storage drawers or boxes with unbuffered acid-free tissue paper, as buffered papers containing calcium carbonate can react unfavorably with shell proteins in the periostracum. Create custom cradles for irregular specimens using polyethylene foam (Volara or Plastazote brands) cut to support the shell at three points without pressure on fragile areas such as lips or spires. For bivalves, use acid-free cardstock to create hinges that hold valves in natural open positions, preventing strain on the ligament while allowing examination of both interior and exterior surfaces.
Pest prevention strategies protect collections from dermestid beetles, museum moths, and other insects that consume organic shell components and paper labels. Rather than toxic mothballs or paradichlorobenzene, which can leave crystalline residues on shells, utilize natural repellents such as Spanish cedar blocks or lavender sachets changed quarterly. Inspect storage areas regularly for signs of insect activity including frass (insect excrement) or silk webbing, and maintain a dedicated freezer for quarantining new acquisitions at -20°C for one week to eliminate hitchhiking pests before introducing specimens to the main collection.
Display Maintenance and UV Protection
Effective shell display maintenance begins with selecting appropriate glazing materials that filter harmful ultraviolet radiation while providing clear visibility. Standard glass blocks approximately 50% of UV light, but specialized museum glass or acrylic such as Tru Vue Optium Museum Acrylic blocks 99% of UV rays while providing anti-reflective properties that enhance viewing. When installing display cases, position them away from direct sunlight even with UV filtering, as infrared radiation can still cause thermal damage and fading of organic pigments over time. For existing cases without UV protection, apply static-cling UV-filtering films to the interior surfaces of glass panels as a cost-effective retrofit solution.
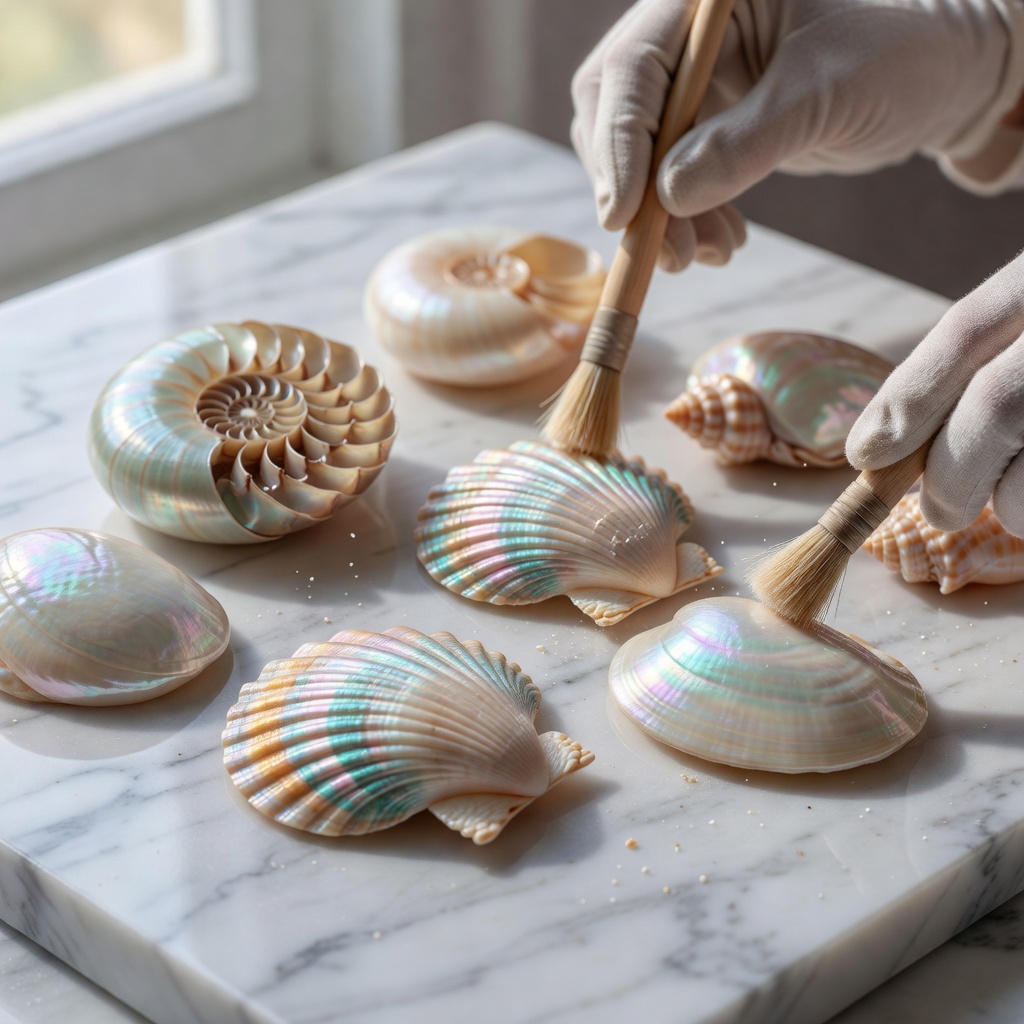
Monthly dusting protocols prevent the accumulation of particulate matter that can scratch shell surfaces during handling or attract moisture. Use canned compressed air held at least six inches from specimens to dislodge loose dust from spiral sculpture and siphonal canals, working from the top of the display downward to prevent resettling on cleaned specimens. Follow air cleaning with gentle brushing using soft makeup brushes (sable or goat hair) for specimens with intricate surface detail, or microfiber dusting wands for smooth shells such as cowries or olives. Never use feather dusters, as barbs can catch on sharp shell edges and cause specimens to topple, while oils from feathers can transfer to porous shell surfaces.
Rotation schedules ensure even light exposure across collections while providing opportunities for inspection and documentation. Implement a quarterly rotation system where specimens in brightly lit display areas exchange positions with those stored in darker cabinets, preventing the uneven fading that creates noticeable color differences between similar specimens over time. During rotation, photograph each shell under consistent lighting conditions to create a visual record of condition changes, and take the opportunity to check for signs of pyrite disease, shell pest activity, or adhesive failure in previously repaired specimens. This proactive approach to shell care and cleaning maintenance preserves both the aesthetic and scientific value of collections for future generations.
Common Shell Care Mistakes to Avoid
Among the most damaging shell cleaning mistakes involves the use of vinegar, lemon juice, or other acidic cleaners on calcium carbonate specimens. These acids react chemically with calcium carbonate, producing carbon dioxide gas and soluble calcium salts that literally dissolve the shell structure. Even brief exposure to household vinegar (5% acetic acid) can etch the surface of polished shells, creating microscopic pitting that destroys luster permanently. While weak acids prove useful for dissolving calcareous encrustations on tools or glass, they should never contact the shell itself, and shells accidentally exposed to acids should be neutralized immediately in a saturated baking soda solution followed by extensive rinsing.
Over-cleaning represents another prevalent error that strips shells of their valuable natural patina and protective surface layers. The darkened or iridescent surfaces that develop on shells buried in specific sediments for decades provide provenance information and aesthetic character that aggressive cleaning destroys. Collectors should distinguish between harmful dirt and beneficial patina, leaving the latter undisturbed while removing only loose debris and biological growth. Similarly, excessive handling during cleaning transfers skin oils and acids that degrade shell surfaces over time, necessitating that collectors minimize physical contact by using handling trays or foam supports rather than holding shells directly during extended cleaning sessions.
Improper drying techniques frequently lead to mold growth and mineral staining that permanently disfigure specimens. Sealing shells in plastic containers while still damp creates anaerobic environments where mold flourishes, producing organic acids that etch shell surfaces and create musty odors impossible to eliminate. Similarly, allowing shells to air dry on metal surfaces or in areas with hard water spray can result in calcium deposit stains that require aggressive mechanical removal. Always dry shells completely on absorbent, lint-free materials in well-ventilated areas with circulating air, and ensure internal cavities are thoroughly dry before storage by using hair dryers on cool settings or allowing extended drying periods for thick-walled specimens such as helmet shells or giant clams.
What is the safest way to start shell care and cleaning for beginners?
Beginning your journey into shell care and cleaning requires starting with the gentlest methods possible to prevent inadvertent damage to your specimens. Fresh water soaking combined with gentle brushing using soft-bristled toothbrushes provides an effective foundation for removing loose debris without risking surface scratches or chemical reactions. Always identify your shell type before proceeding beyond basic cleaning, as different species require different pH levels and cleaning intensities; for example, the fragile paper nautilus demands far more delicate handling than the robust Florida horse conch. Establish a dedicated workspace with good lighting, padded surfaces, and proper ventilation before handling any shells, ensuring you can focus on the task without rushing or risking accidents that might chip valuable specimens.
Can I use bleach for shell care and cleaning?
While diluted bleach solutions between 5% and 10% concentration can effectively whiten shells and remove organic staining, this approach weakens the calcium carbonate structure over time and inevitably destroys the natural periostracum layer that gives shells their color and protection. Chlorine bleach penetrates the microscopic structure of the shell, breaking down organic matrices that bind calcium carbonate crystals together, potentially leading to brittleness and surface crazing years after treatment. Hydrogen peroxide represents a significantly safer alternative that achieves similar whitening effects through oxidation without the corrosive chloride ions present in bleach, and it decomposes into water and oxygen rather than leaving harmful residues. For collectors concerned with long-term preservation and scientific value, avoiding chlorine-based products entirely ensures specimens remain stable for decades rather than degrading prematurely.
How do I remove bad odors during shell care and cleaning?
Malodorous shells typically indicate residual organic decomposition within internal chambers or siphonal canals that requires targeted treatment beyond standard washing. Soak offending specimens in a solution of warm distilled water and baking soda, using one tablespoon per quart, for 24 to 48 hours to neutralize acidic decomposition byproducts while absorbing odor molecules. For persistent smells that resist chemical treatment, bury the shell completely in dry, unscented cat litter or diatomaceous earth for one week, as these materials absorb both moisture and odor-causing compounds through physical adsorption. Alternatively, enzyme-based cleaners designed for organic material removal, such as those used in taxidermy or crime scene cleanup, digest remaining proteinaceous matter at the molecular level, eliminating odor sources permanently rather than merely masking them with fragrances.
Should I oil my shells after cleaning?
Applying mineral oil or baby oil can restore temporary luster to chalky, dull shells by filling microscopic surface irregularities and enhancing light reflection, but this treatment requires careful consideration of the specimen's value and intended use. Use cotton swabs to apply oil sparingly in thin, even coats that can be buffed gently with lint-free cloths, avoiding saturation that might trap moisture or attract environmental dust particles. However, serious collectors and museums generally avoid oiling rare or scientifically valuable specimens because oil applications complicate future conservation efforts, potentially interfere with DNA sampling or isotopic analysis, and require regular reapplication as the oil oxidizes or evaporates over time. If you choose to oil shells for display purposes, maintain detailed records of the treatment date and materials used so future owners can make informed decisions about removal or maintenance.
How often should I perform maintenance cleaning on displayed shells?
Displayed shells require monthly dusting using compressed air directed at an angle to dislodge particles without driving them deeper into surface sculpture, supplemented by gentle brushing with soft makeup brushes or camel hair artists' brushes for specimens with intricate detail. Deep cleaning involving water immersion, chemical treatments, or mechanical removal of deposits should only occur when shells are first collected or acquired, or when specific contamination occurs, rather than as a routine maintenance procedure. Excessive handling and repeated cleaning can damage the surface structure, remove protective periostracum layers, and increase the risk of accidental drops or breakage, particularly for thin-walled specimens such as olive shells or certain cowries. Establish a inspection schedule that emphasizes visual examination for pest activity or environmental damage rather than physical cleaning, preserving the natural state of the shell while ensuring its long-term stability.
What tools are essential for beginner shell care and cleaning?
A basic shell care and cleaning toolkit should include soft toothbrushes with rounded bristles for general scrubbing, wooden dental picks or bamboo skewers for gentle debris removal, and cotton swabs for applying cleaning solutions to specific areas without oversaturation. Distilled water serves as the primary cleaning medium, supplemented by mild phosphate-free dish soap for cutting grease and organic films, while 3% hydrogen peroxide provides whitening capabilities for lightly stained specimens. Microfiber cloths prove essential for drying and buffing without scratching, while a rubber bulb syringe helps flush debris from siphonal canals and internal chambers. Avoid metal tools including steel wool or wire brushes that can scratch calcium carbonate surfaces, and always work over padded surfaces such as towels or foam sheets to prevent breakage if specimens slip from your grasp during cleaning.
How do I clean shells with living organisms inside?
Ethical collecting practices dictate that you should never collect shells containing living organisms, as removing creatures from their habitat damages marine ecosystems and often violates local wildlife regulations protecting mollusk populations. If you discover a living creature inside a shell after collection, return it to the ocean immediately in the location where found, placing it gently on the substrate or in a tidal pool rather than throwing it into deep water. For recently deceased specimens where tissue remains present, first freeze the shell for 48 hours to kill bacteria and halt decomposition, then place the specimen in a ventilated outdoor container protected from rain and scavengers, allowing natural decomposition to occur over several weeks before attempting cleaning. This natural decay process, while requiring patience, proves gentler on shell structure than chemical maceration and eliminates the odor problems associated with rapid decomposition in enclosed spaces.
Can damaged shells be restored during the cleaning process?
Minor chips, cracks, and breaks can indeed be repaired during the cleaning and conservation process using archival adhesives such as Paraloid B-72 dissolved in acetone, which creates strong, reversible bonds without the yellowing associated with household superglues. For simple breaks, apply the adhesive to both surfaces, join them with gentle pressure, and remove excess with acetone-dampened cotton swabs before the solution cures, supporting the shell in a sand bed or clay mold until dry. However, significant restoration involving the reconstruction of missing sections, extensive color retouching, or structural reinforcement should be left to professional conservators who possess the microscopy equipment, materials, and training necessary to execute repairs that maintain scientific and monetary value. Improper repair using cyanoacrylate glues or epoxy resins can permanently damage specimens by creating acidic microenvironments, becoming irreversible, or obscuring diagnostic features that researchers need for identification and study.